在之前的文章中配置好了PVE基础系统的环境和OpenWrt的网络环境,接下来就要开心的折腾小主机了。
话说 “磨刀不误砍柴工”,所以在此之前,我们先要磨磨刀。
通过之前的了解,我们知道PVE系统底层就是基于Debian的Linux系统,所以在后续我们需要安装一些依赖文件的时候,就是在Debian系统下的那些操作了。而此时就会遇到安装依赖包慢的问题:PVE7默认配置的apt软件源和CT容器模板源均是官方默认的,而在国内访问又会遇到 “你懂得” 的问题。所以我们要先来加个速。
更换软件源
我当前使用的PVE系统版本是 v7.1-2,基于 Debian 11 bullseye 系统。
默认以 root 用户登录系统并操作。查看系统版本信息:
1 | root@pve:~# cat /etc/os-release |
apt软件源
替换前可以先尝试更新下证书,主要是为了防止证书不可用导致无法拉取 https 源的情况。
1 | # apt install apt-transport-https ca-certificates |
首先替换通用软件源,Debian 系统的软件源配置文件是 /etc/apt/sources.list ,先对该文件进行备份:
1 | # cp /etc/apt/sources.list /etc/apt/sources.list.bak |
然后将其中内容修改为如下,这里我选择使用清华的软件源地址:
1 | deb https://mirrors.tuna.tsinghua.edu.cn/debian/ bullseye main contrib non-free |
- debian | 镜像站使用帮助 | 清华大学开源软件镜像站 | Tsinghua Open Source Mirror
- proxmox | 镜像站使用帮助 | 清华大学开源软件镜像站 | Tsinghua Open Source Mirror
pve软件源
pve镜像默认的pve软件源配置文件是 /etc/apt/sources.list.d/pve-enterprise.list ,将该文件备份:
1 | # cp /etc/apt/sources.list.d/pve-enterprise.list /etc/apt/sources.list.d/pve-enterprise.list.bak |
并将内容替换为以下:
1 | deb https://mirrors.tuna.tsinghua.edu.cn/proxmox/debian bullseye pve-no-subscription |
更新
最后,执行更新操作:
1 | # apt-get update |
一个问题
当我执行更新命令后,却输出了如下的报错信息:
1 | # apt-get update |
后来参考了网络上的相关问题,发现原来是 DNS没有配置好。
解决方法是编辑如下文件:
1 | # vi /etc/resolv.conf |
然后将 nameserver 223.5.5.5 添加到其中:
1 | nameserver 127.0.0.1 |
我这里选择的是阿里云的DNS,当然也可以是 8.8.8.8 或者 114.114.114.114 。之后再次执行 apt-get update 发现软件源更新成功了。
修改CT容器源
什么是CT容器
PVE中的CT容器,也叫LXC容器。
LXC为Linux Container的简写。可以提供轻量级的虚拟化,以便隔离进程和资源,而且不需要提供指令解释机制以及全虚拟化的其他复杂性。
以下统称为 CT容器。
修改模板镜像源
当创建CT容器时,需要先下载相应系统的模板镜像,此时就涉及到模板镜像的软件源了。
CT Templates 的配置文件为 /usr/share/perl5/PVE/APLInfo.pm 。将其中默认的源地址 http://download.proxmox.com 替换为 https://mirrors.tuna.tsinghua.edu.cn/proxmox 即可。
先备份该配置文件:
1 | # cp /usr/share/perl5/PVE/APLInfo.pm /usr/share/perl5/PVE/APLInfo.pm.bak |
然后执行命令:
1 | # sed -i 's|http://download.proxmox.com|https://mirrors.tuna.tsinghua.edu.cn/proxmox|g' /usr/share/perl5/PVE/APLInfo.pm |
针对 /usr/share/perl5/PVE/APLInfo.pm 文件的修改,重启服务后生效。
1 | # systemctl restart pvedaemon.service |
之后,在 PVE 网页端下载 CT Templates 的速度就快了。
下载CT Templates
想要创建CT容器,先要下载相应的CT模板镜像。
下载模板镜像,有三种方法。
网页端下载
网页端下载我们可以直接在PVE系统中操作。
依次选择左侧数据中心下的 pve – local(pve) – CT模板 – 模板 :
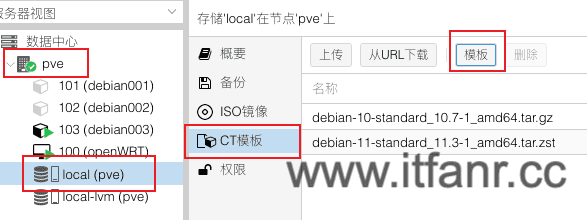
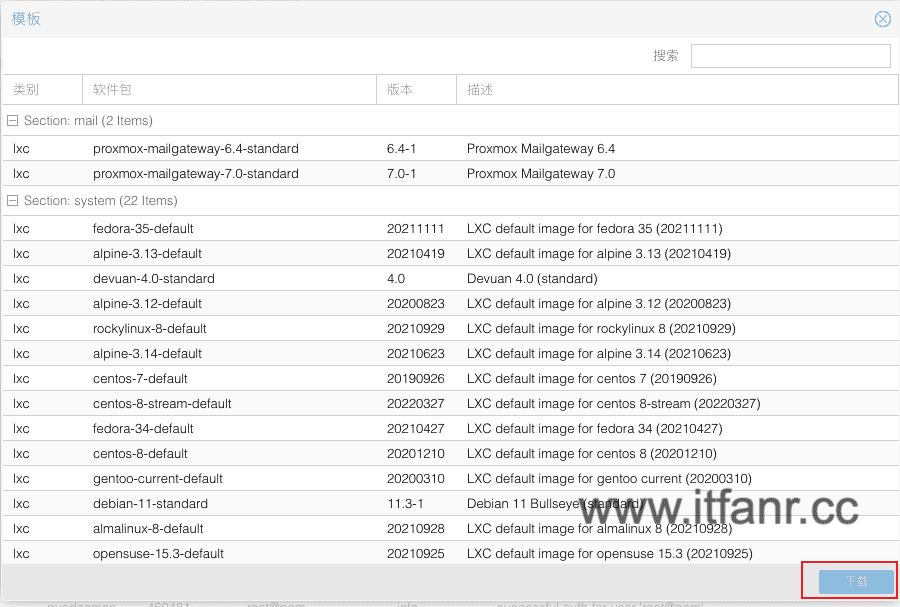
在弹出的窗口中选择想要使用的系统镜像,点击底部的 下载 按钮即可下载到本地:
网页+命令行方式
如果不想在页面中操作,我们也可以自己通过命令下载想要的镜像文件。
打开网址 Index of /images/system/ 找到相应镜像:
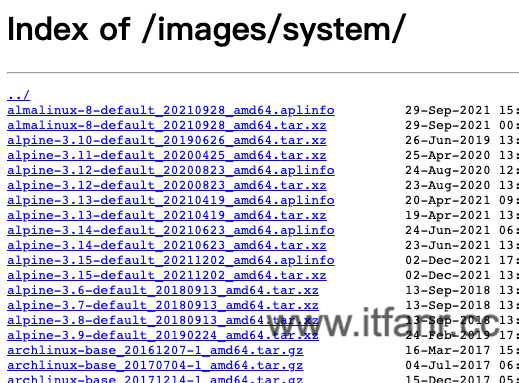
然后登录到PVE系统的控制台窗口。依次选择左侧数据中心下的 pve – 右侧 Shell ,通过 wget 或 curl 命令下载镜像文件到本地。

命令行下载
如果更喜欢命令行的操作方式,也可以选择PVE系统自带的 pveam 命令来进行操作。
首先刷新模板列表:
1 | # pveam update |
然后查看可下载的镜像文件列表:
1 | # pveam available |
也可以筛选查看基础系统镜像:
1 | # pveam available --section system |
在使用镜像前,先要将镜像下载到本地。这里我选择PVE系统中默认的 local 存储。
选择并复制想要的镜像名,执行 pveam download 命令进行下载:
1 | # pveam download local debian-11-standard_11.3-1_amd64.tar.zst |
可以通过 pveam list 命令来查看当前本地已经下载的镜像列表:
1 | # pveam list local |
CT容器安装系统
CT Template 镜像文件已经有了,下面来创建该CT容器。
这里我以 Debian 11 系统镜像为例。
选择PVE系统顶部菜单栏中的 创建CT 按钮

在弹出的 创建:LXC容器 窗口 常规 选项卡中,填写以下几项:
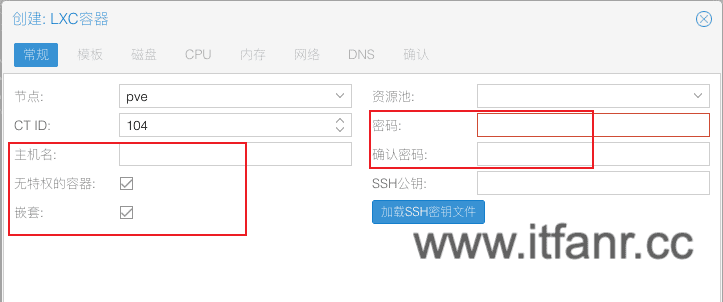
其中,CT ID 是系统默认编号,可以自定义,只要保证唯一就行。
无特权的容器 和 嵌套 两项一定要勾选。
嵌套 选项可以在CT容器里继续使用相关虚拟化技术,比如运行Docker。
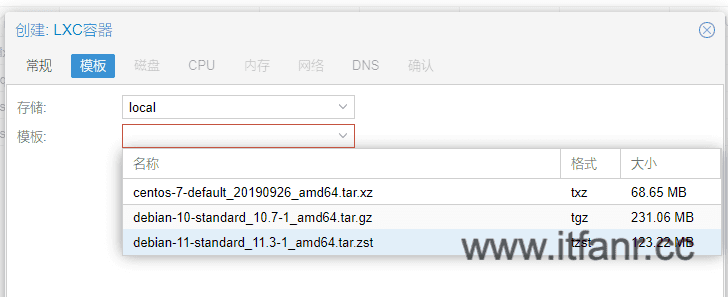
在 模板 选项卡中,选择刚刚下载的镜像文件:
在 磁盘 选项卡中,设置磁盘大小:

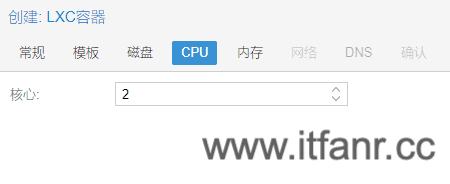
在 CPU 选项卡中,设置分配的cpu核数:
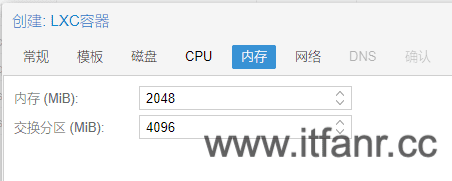
在 内存 选项卡中,分配内存大小。交换分区大小一般可以设置为内存大小的两倍:
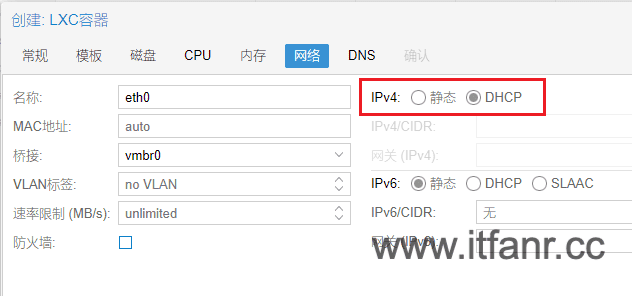
在 网络 选项卡中,将 IPv4 选择为 DHCP ,由 OpenWrt 来分配IP:
DNS 选项卡保持默认:

在 确认 选项卡中确认系统配置信息,完成配置。
之后,我们就可以在左侧树形菜单中看到刚刚创建的CT容器了。
Debian11配置Docker
在 Debian 系统下配置 Docker 是比较简单的,直接按照官方教程来操作即可。这里仅作参考。
配置apt国内源
先将默认配置文件备份:
1 | mv /etc/apt/sources.list /etc/apt/sources.list.bak |
然后执行命令:
1 | cat >> /etc/apt/sources.list << EOF |
执行更新:
1 | apt update |
开启SSH访问
Debian11 默认禁用了 root 用户 SSH 登录,安装时候推荐创建特定用户作为管理员帐号。
可以通过修改 SSH 配置开启 root 账户的权限。
执行更新:
1 | apt update |
安装 vim:
1 | apt install vim |
安装 openssh 服务:
1 | apt install openssh-server |
查看ssh服务状态:
1 | systemctl status ssh.service |
通过 vim 编辑ssh配置文件 /etc/ssh/sshd_config
1 | vim /etc/ssh/sshd_config |
将 PermitRootLogin 设置为 yes, 再将 PasswordAuthentication 设置为 yes ,:wq 保存退出即可。
1 | PermitRootLogin yes |
重启 ssh 服务:
1 | systemctl restart ssh.service |
设置服务开机自启动:
1 | systemctl enable ssh.service |
这个时候就可以关闭当前PVE打开的控制台网页窗口,通过 SSH 工具访问该CT容器系统,查看是否能够正常登录。
配置Docker
默认以 root 用户操作:
1 | apt update |
docker加速
依然以 root 用户执行以下命令:
1 | mkdir -p /etc/docker |
docker-compose
以 root 用户执行命令:
1 | curl -L "https://github.com/docker/compose/releases/download/1.29.2/docker-compose-$(uname -s)-$(uname -m)" -o /usr/local/bin/docker-compose |
问题解决
sudo 命令
在配置 Docker加速 时,一开始考虑通过 daocloud 提供的一键安装命令来配置:
1 | curl -sSL https://get.daocloud.io/daotools/set_mirror.sh | sh -s http://f1361db2.m.daocloud.io |
结果发现执行后有错误提示:
1 | docker version >= 1.12 |
因为 Debian系统默认没有安装 sudo 命令。可以选择安装:
1 | # apt install sudo -y |
不支持CentOS7镜像
因为之前配置的个人云服务器一直使用的都是 CentOS7 的系统,当开始打算创建CT容器时,就考虑直接安装 CentOS-7 的系统镜像。
结果系统能够正常安装,却总是无法启动,一直显示一个黑窗口。
后来参照文章 proxmox中 centos7 lxc 无法使用root登录_phrnet的博客-CSDN博客 中的介绍:
在选项中,选择控制台为:shell(除了tty)就可以了。
修改配置后是能够进入系统了,但却发现执行命令很卡顿,并且想要关闭退出CT容器时,出现了系统无法关闭的情况。
无论是执行 shutdown -h now 命令,还是点击停止CT容器,网页一直卡在转圈圈的界面,等了很久都不能关闭,或者直接提示错误:
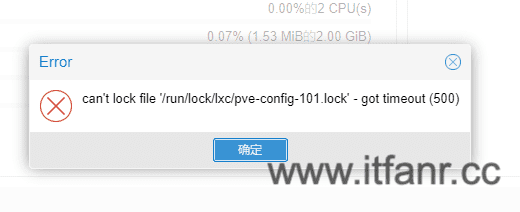
后来在PVE系统界面底部的操作日志中发现了具体的错误提示信息:
WARN: old systemd (< v232) detected, container won’t run in a pure cgroupv2 environment! Please see documentation -> container -> cgroup version.
Task finished with 1 warning(s)!
查询了相关资料,原来 PVE7 对于 CentOS 7 及以下版本的系统已经不支持了。
CentOS 7 and Ubuntu 16.10 are two prominent Linux distributions releases, which have a systemd version that is too old to run in a cgroupv2 environment.
即:PVE7对于 CentOS 7 和 Ubuntu 16.10 及以下版本不支持,建议安装 Ubuntu 18.04 或 CentOS 8 及以上版本。
详细的说明可以参考 Proxmox Container Toolkit
至此,配置完成。